Buy for the cut as much as for the size
A tight cauliflower with a sturdy center can become a tray of wedges. A looser head can make excellent florets but may fall apart when you try to lift a thick slice. Look at the base first. If the main stalk is substantial and the outer florets are closely packed, there is a good chance you can keep some broad pieces together. That is useful when you want a browned cut surface instead of a whole tray of little branches.
Use one medium cauliflower for a side dish or the center of a simple dinner. Have olive oil, fine salt, and black pepper ready. For the serving sauce, set out plain yogurt, a lemon, and a few tender herb leaves. Parsley or mint works well. The sauce can be made without herbs if you have none. If the yogurt is quite thick, have a little water available to loosen it. The vegetables will be hot and the sauce cool, which makes it possible to taste each clearly.
The outer leaves are part of the vegetable if they are sound and tender enough to eat. Remove the largest tough leaves so you can see the stalk. Save a few smaller ones for the tray or use them another way. The thickest ribs take longer than the leafy ends and may be more useful sliced thin. Look at the leaves separately before scattering them over the same pan. A paper-thin edge can darken well before the cauliflower itself is ready.
Cut through the center first
Place the head on a steady board with the base down if it stands securely. If it wobbles, turn it to a more stable position and make the first cut where you can control the knife. Cut it in half through the stalk. Put each half on its cut face and divide it into thick wedges, keeping a narrow strip of the central stalk with each piece. Use the stalk as a hinge. A wedge can lose some of its buds and still hold together if that strip remains attached.
The outer sections will often break away into florets. Use them as the second shape in the tray. Cut unusually thick stems lengthwise so the florets have a reasonably flat surface. Keep the smallest loose crumbs off the main pan at the beginning. You can add them near the end if you want a crisp garnish, or save them to cook in another meal. They need less heat than the wedges and are easy to miss while you are checking a larger piece.
Pat the cut surfaces dry if they are wet. When you put a wedge down, find the broadest face and see whether it rocks on a little projection. Trim the projection if it keeps the rest of the wedge from touching the pan. You can also leave the irregular face up and brown the other side first. The cut face produces the most noticeable color, while the buds get a drier, more textured edge.
Let the flat side stay against the pan
Heat the oven to 425°F or about 220°C with a rack near the middle. Use a metal baking sheet wide enough to hold the wedges with open areas around them. If you use parchment, check its heat rating and follow the package directions. Brush a little oil onto the largest pieces or toss them gently in a broad bowl. Sprinkle salt evenly across the cut surfaces. The florets can take a quick toss in the same bowl after the wedges have come out.
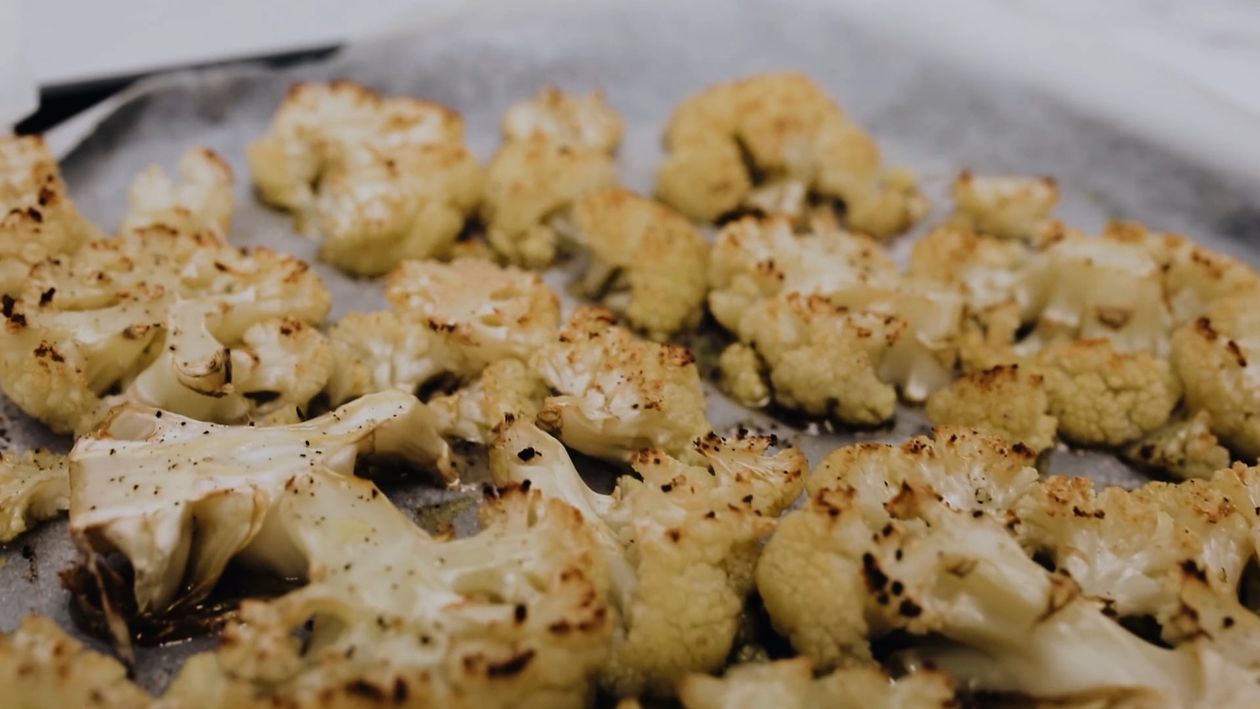
Place the wedges flat against the pan, leaving space to turn each one. Roast them alone for the first ten to fifteen minutes if the other pieces are much smaller. At the first check, lift an outer edge with a thin spatula. Look for a golden patch developing beneath it. If it is still pale, leave it in contact with the pan and return it to the oven. Turn the piece when the color is pronounced enough to survive another stretch of cooking.
Add the florets around the edges when you turn the wedges. Set the cut sides down and watch the spacing. If the pieces need to sit on top of one another, give the florets their own tray. Roast until the stems are tender enough to eat and the exposed buds have darkened in places. The total time depends on the size of the cauliflower and the thickness of each wedge. Start checking the florets after about ten minutes, and let the feel at the stalk guide the larger pieces.
Remove each shape when it is ready
Check a wedge at the point where its stalk is widest. A knife should enter without forcing the whole wedge across the pan. If the center is firm and the cut surfaces already have enough color, move the pan away from the hottest element or lower the temperature a little. Give the center a few more minutes. Lift out any florets that are ready so they can keep their texture. It is easier to remove three small pieces than to make the entire tray wait for one thick stalk.
If one cut surface is still pale but the wedge is otherwise tender, move it to a bare part of the pan and leave it for another minute or two. A spot that has been under a wet floret may need time to dry. If the buds have already turned dark at the tips, turn those tips away from the top element. The outer color and the center can be managed separately. A broad spatula helps you reposition the wedge without separating the florets that are still attached.
Taste one floret before seasoning the entire tray again. The salt on a wedge can seem stronger because it sits on one large face. A bare stem may need a small pinch while the buds need nothing. Season the cut pieces as you plate them. A shower of fine salt across the whole tray can land mostly on the parts that already have the most flavor. Use a few flakes on the surface only if you want to notice their texture.
If you need to hold the pieces briefly before dinner, leave them in a single layer. Stacking traps steam between their surfaces. Add the cool sauce only when you are ready to serve.
Make the sauce while the wedges finish
Spoon about half a cup of plain yogurt into a small bowl. Grate a little lemon zest over it and add a few drops of juice. Stir, taste, and add a small pinch of salt if the yogurt needs it. If it stays in a mound and you want a sauce that can be spooned beside the wedges, add cool water a teaspoon at a time. Stop when it falls from the spoon in a thick ribbon. A very loose sauce will run under the cauliflower and soften the crispest surface.
Chop the herbs and add them near serving time. Keep a little of the plain sauce aside if you want to compare how much the herbs change it. Mint brings out the coolness of the yogurt. Parsley tastes greener and is a little quieter beside a roasted edge. If the lemon already gives the dish enough lift, use a few chopped leaves on top instead of stirring them through the whole bowl.
Serve with the browned sides facing up. Put the sauce to one side where people can use it a bite at a time. You can also spread a little under the thicker center of each wedge, keeping the edges exposed. A handful of cooked grain or a simple bean salad can make the cauliflower the main part of dinner. Taste those together before adding another dressing or a second garnish. The acid in the sauce may do enough for the plate.
Keep the useful parts of the method for another tray
If you liked the broad color but the wedges were difficult to cut, try two thick center slices and turn the outside pieces into florets. If the smaller pieces were your favorite, roast all the cauliflower that way next time and give the cut stalks as much contact with the pan as the buds. The same cooking cues apply. The firmest pieces need to yield, and the flat faces need enough time against hot metal to turn golden.
Try one seasoning change after you know how your oven handles the cauliflower. A little ground cumin in the oil will give the wedges an earthy flavor. A pinch of smoked paprika adds color quickly, so check the underside for actual browning before taking them out. A few toasted breadcrumbs can be added after roasting if you want a second kind of crunch. Keep the yogurt simple on the first comparison so you can tell which change you liked.
Note the thickness of the wedge you were happiest to eat. On a larger cauliflower, cut a comparable piece rather than automatically dividing it into the same number of sections. The stalk's shape changes from one head to the next. The size of a tender, browned wedge is a more useful thing to repeat than the number of cuts you made to get it.