Measure the banana after you have peeled it
Banana bread often gets described as a recipe for three bananas, but the weight of three fruit can vary enough to change the loaf. A small banana with a thick peel may give much less mash than a large ripe one. Weigh the peeled fruit for the first bake. That makes it possible to repeat the texture even when the next bunch looks different. Choose ripe bananas that smell sweet and are sound inside. A spotted peel can be useful because the fruit is easier to mash, but discard bananas showing spoilage.
For a standard nine-by-five-inch loaf pan, start with about 250 grams of peeled banana, 225 grams of plain all-purpose flour, 110 grams of sugar, two large eggs, 90 grams of neutral oil, one teaspoon of baking soda, and half a teaspoon of fine salt. A little vanilla or cinnamon is optional. For a first bake, leave out large quantities of nuts or chocolate until you see how the plain crumb sets. If you use an addition, choose a small handful and chop it into pieces that will fit comfortably in a slice.
Heat the oven to 350°F or about 175°C. Prepare the tin according to its instructions, lightly greasing it and using a strip of baking parchment if helpful. Use parchment rated for the temperature. Put the prepared pan on a clear surface near the mixing bowl. Once the batter is mixed, you should be able to transfer it without searching for the loaf tin or taking other things out of the oven.
Use the fork to decide how visible the fruit should be
Break the peeled bananas into pieces and mash with a fork or potato masher. For an even crumb, press until the mixture is mostly smooth with a few small soft pieces. If you like visible flecks of fruit, leave some lumps smaller than a pea. Very large chunks can leave damp pockets in the loaf and make it harder to tell whether a tester picked up fruit or raw batter. Use the same mash across the whole first loaf so you can read the finished result clearly.
Add the eggs and sugar to a second bowl and whisk until they blend. Pour in the oil and mix until it no longer sits in a separate band. Stir in the banana and any vanilla. There is no need to beat the mixture into a thick foam. A smooth wet mixture makes it easier to combine the batter without having to stir it for a long time after the flour goes in.
If you have extra mash, weigh out the amount for the loaf and move the rest to a suitable container for another use. Do not pour the extra in just because it is already mashed. Too much fruit can keep the middle wet while the edges turn dark. If your bananas make less than the recipe needs, a smaller bake or another banana is easier to predict than adding a large amount of liquid. The amount of mashed fruit is one of the parts of this recipe worth keeping steady.
Thawed bananas can work when they were frozen and handled safely. Thaw them in the refrigerator and measure the mash with the liquid it released. If it is very watery compared with freshly mashed fruit, use a fresh banana for part of the weight. The main thing to avoid is adding all the liquid from a large bag and then estimating how much fruit you put in. A measured portion is easier to compare with the loaf you made before.
Mix the batter in broad, short strokes
Whisk the flour, baking soda, salt, and cinnamon if using in a large bowl. Inspect the mixture and break up visible clumps. Baking soda distributed unevenly can leave an unpleasant bite, especially in a loaf with a simple flavor. Make a hollow in the center and pour in the wet mixture. Fold from the outside in with a broad spatula, scraping across the base so dry flour does not stay underneath the batter.
Stop when you can no longer see dry flour. The batter can look a little rough because of the fruit. A few uneven patches are expected. A long series of hard strokes is more likely to tighten the crumb than to improve it. If you have a small handful of chopped additions, put them in as the last streaks of flour disappear. This lets you finish the mixing in one short round.
Scrape the batter into the prepared pan and spread it into the corners. Look at the fill level. A very full pan may take longer to set in the middle and can overflow. Use a pan of the intended size, or put extra batter into a separate suitable small pan rather than filling the loaf tin above the manufacturer's guidance. If you split the batter, check the smaller portion earlier.
Trust the middle more than the color at the edge
Bake on a middle rack for roughly fifty to sixty-five minutes, checking before the longer end of the range. The exact timing depends on the depth of the batter, the loaf pan, and the oven. The top may split and darken while the deepest part remains wet. Insert a clean thin tester into the middle when the top looks set. A few damp crumbs can be fine. A stripe of uncooked batter means the loaf needs more time. Test a nearby spot if the first mark looks like a soft piece of banana.
If the top is dark before the center sets, use a loose foil shield as appropriate for your oven, keeping it away from heating elements. Give the loaf another brief stretch and check the center again. A smaller pan can make the same amount of batter deeper. Start with a more suitable tin next time if you find you need to protect the top for a long time. Check the first loaf rather than trying to force the center to finish at the time printed on a different recipe.
Set the pan on a rack and wait until the loaf can be lifted without breaking. Ten to fifteen minutes can be enough if the edges release readily. Ease the sides away and lift by the parchment if used, then cool completely on the rack. The bottom needs air as much as the top. A warm slice may compress under the knife even when the loaf is well baked, so give the center time before you judge it.
If you are deciding between a lighter and darker finish, cut one of the end slices from a loaf that baked all the way through and compare it with a center slice. Toast a small piece of the center separately. This can show whether you want more browning overall or only more texture on the outside of each serving. Keeping the middle tender and toasting the slice later is an option if you like a firmer edge with breakfast.
Use the first cut to work out the next change
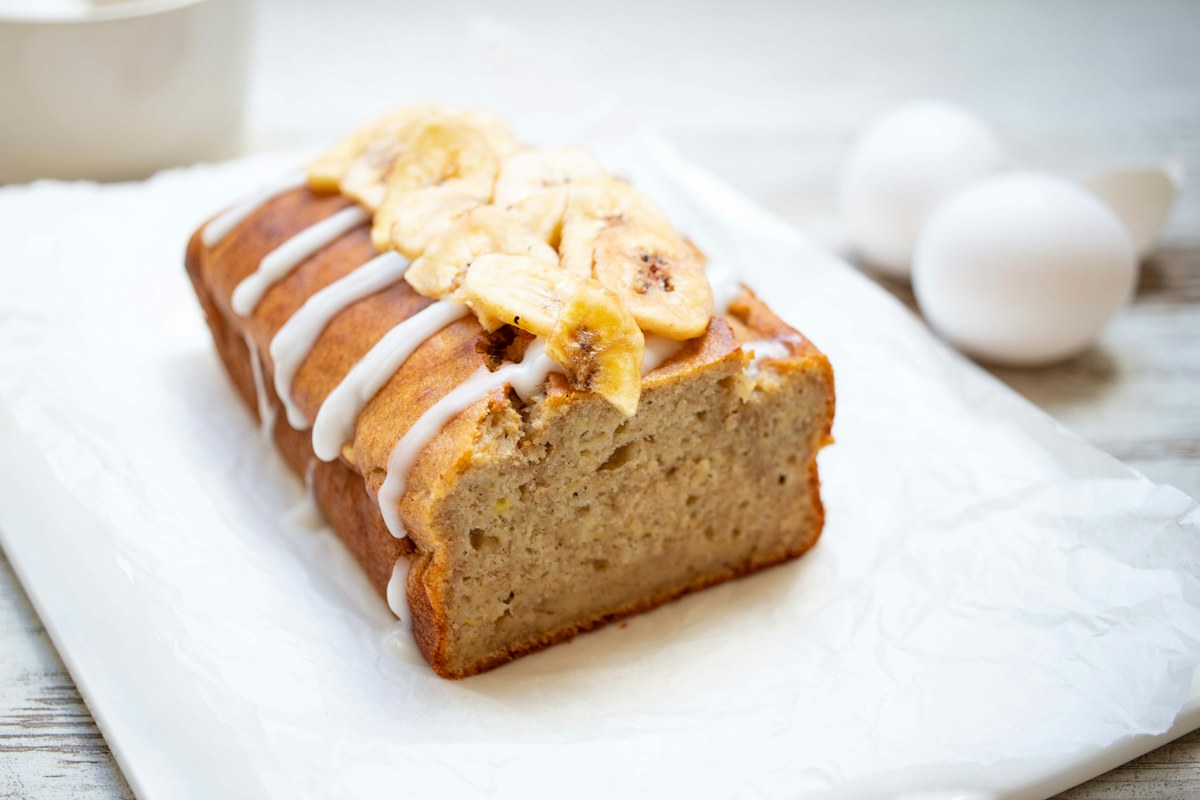
Slice across the center with a serrated knife. Look for an even crumb with small pockets of banana and no wet streak through the middle. A heavy band at the bottom may mean the batter had too much fruit or did not have time to bake through. Check the actual banana weight and pan size before changing the recipe. A very dry edge around a tender center might call for a lighter pan or an earlier first check.
Taste the end and the middle separately. The end usually carries more toasted flavor. The middle tells you whether the banana and spice came through. If the loaf was sweet enough but the fruit tasted quiet, choose riper sound fruit next time instead of increasing the sugar. If it tastes too sweet for breakfast, reduce the sugar modestly in a later batch and note whether the crust and crumb change. The same sugar also affects browning, so make that change by itself.
For a loaf with nuts or chocolate, cut them small enough that each slice stays easy to cut. Toasted walnuts can give the soft crumb a different edge if they suit the people eating it. A little chopped chocolate can make a richer loaf, especially near the middle. Use one addition at first and see whether the loaf still tastes mainly of banana. Check allergen information and keep separate portions when needed.
Keep the next slice useful
Cool the loaf fully before covering it, and store it according to appropriate guidance for the ingredients and conditions. Slice before freezing if you plan to take out single pieces. Separate the slices or arrange them so they are easy to lift once frozen. A thin slice can be warmed briefly if you want a firmer outside. Follow the toaster or oven instructions and stay close if the loaf contains loose pieces that can fall or burn.
Write down the banana weight, the loaf pan, and the time when the center tested ready. Add one note about the fruit texture, such as mostly smooth or a few distinct flecks. Those details will help you decide whether to repeat the loaf or change it. If the next bunch gives you the same weight but tastes a little different, keep the rest steady and let the banana remain the part you notice.