Choose an apple for the texture as well as the flavor
An apple cake can have soft pieces that blend into the crumb or distinct cubes that remain after slicing. Pick a firm baking apple if you want the second result. Taste a piece before deciding how much spice to use. A tart apple can support a small amount of cinnamon and sugar without becoming too quiet. A sweeter apple may be pleasant with a little lemon zest and no additional flavoring. Use the sort of apple you can identify at the shop so you can compare a second bake if you want a different result.
For a standard nine-by-five-inch loaf pan, gather about 220 grams of all-purpose flour, 125 grams of granulated sugar, one and a half teaspoons of baking powder, half a teaspoon of fine salt, and up to a teaspoon of ground cinnamon. For the wet ingredients, use two large eggs, 100 grams of neutral oil, and 90 grams of plain yogurt. Prepare 180 to 200 grams of peeled or unpeeled diced apple after trimming the core. A little finely grated lemon zest is optional. Keep the amount of apple within that range for the first trial, so the center has a fair chance to set before the outside gets too dark.
Check that the pan is reasonably close to the stated size. A narrower tin can make the loaf taller and require more time. A much wider pan makes a shallower cake and can bake faster. Follow the maker's guidance for preparing the pan. A light coat of oil and a strip of baking parchment across the long sides can make the loaf easier to lift. Leave the ends of the paper low enough that they do not touch the oven elements. Heat the oven to 350°F or about 175°C before mixing the final batter.
Cut the apples so they fit inside a slice
Wash the apple and dry it before cutting. Peel it if you want a smoother crumb, particularly if the skin feels thick. Thin skin can give the slice a little color and texture. Quarter the fruit on a stable board and remove the core from each piece. Cut across the quarters into strips and then into dice. Aim for pieces around a quarter to half an inch across. A very large piece can leave a damp pocket. A very fine dice becomes part of the batter and can make it harder to notice the fruit.
Weigh the cut apple rather than the whole fruit. A large core and thick peel can make a difference. If you have more than the batter needs, keep the remainder for a different meal. Look for a few very wet pieces and pat the cut surfaces dry if they have released a puddle on the board. There is no need to squeeze the apple. You want its flavor and some moisture, while keeping the quantity predictable.
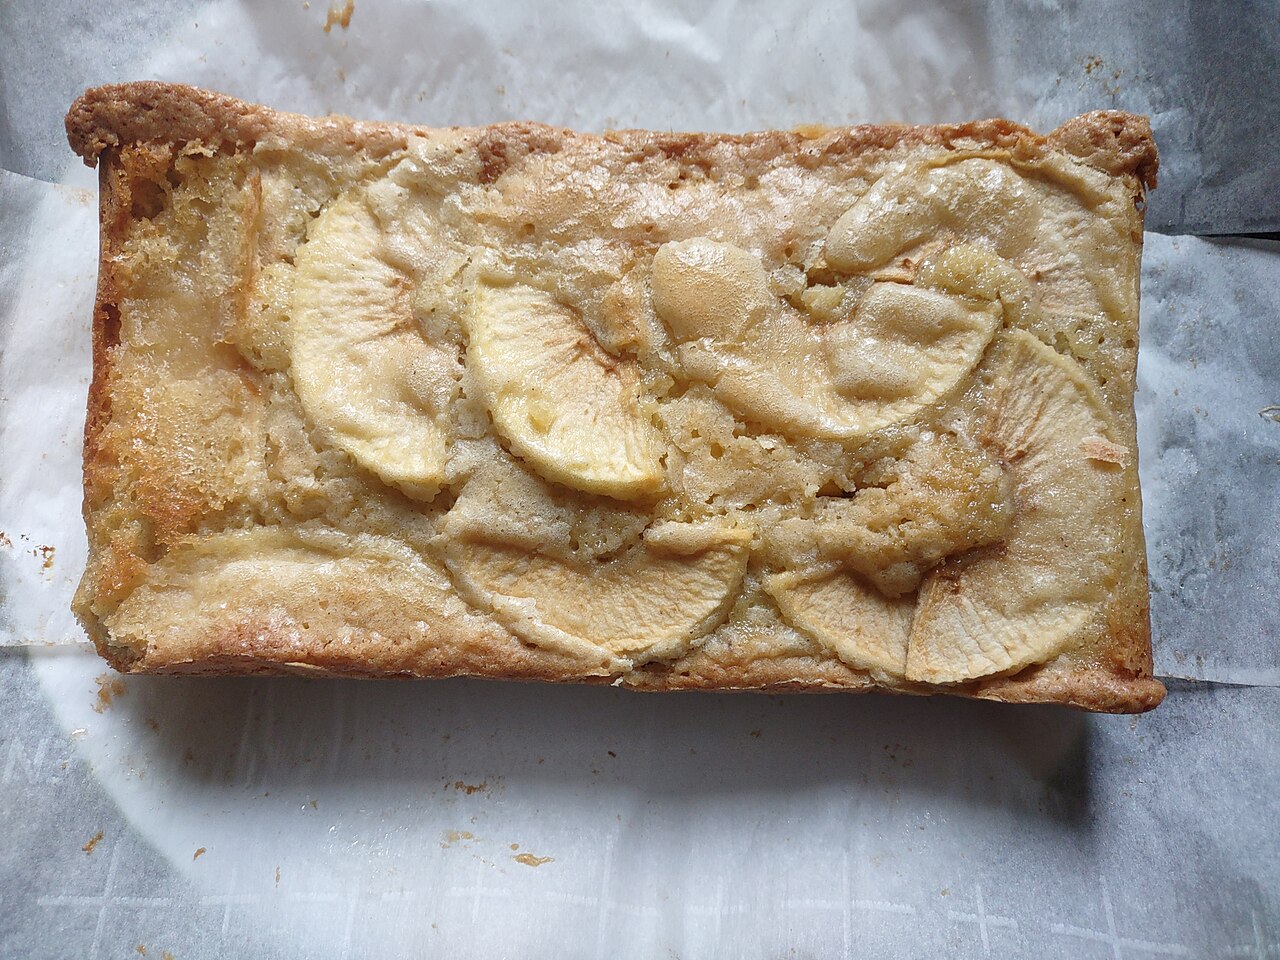
If you would like a visible top, save a few smaller slices rather than pressing all the fruit into the middle. Lay them in a single line before baking and leave enough batter exposed to judge its color. Thick pieces on top can weigh down a narrow section. For a first loaf, folding all the diced fruit into the batter can be easier to interpret. It lets you see how much of the fruit reaches each slice without also trying to judge a separate topping.
Mix wet and dry ingredients separately
Whisk the flour, baking powder, salt, and cinnamon together in a large bowl. Break up any visible clump of baking powder or spice. A little powder can land in one bite if it stays in a cluster. In another bowl, whisk the eggs and sugar until the mixture looks even. Whisk in the oil in a thin stream, then add the yogurt and zest if using. You are looking for a blended liquid rather than a thick foam.
Make a hollow in the dry ingredients and pour the wet mixture into it. Draw flour from the edge and fold it toward the middle with a flexible spatula. Keep the strokes broad enough to reach the bottom. When only a few streaks of flour remain, add the diced apple. Fold until the fruit is distributed and the flour is no longer visible. Stop once the mixture is even. A long stirring session after the flour is wet can make the finished cake feel tighter.
Check the batter while it is still in the bowl. It should be thick enough for the apple to stay in place and soft enough to fall from the spatula. If it looks very stiff, confirm that the yogurt and oil went in before changing the recipe. If it is very loose, check whether the cut apples carried a lot of liquid. Make the first bake without adding a large amount of extra flour. The finished crumb will tell you more about whether the amount was right than the wet mixture alone.
Check the middle after the edges have browned
Transfer the batter to the prepared pan and level it lightly. Slide it onto a middle rack and bake for roughly fifty to sixty-five minutes. Begin looking before the longer end of that range. A loaf pan can color the sides and top before the center is ready. Look for a well-browned top that appears set along the crack, then use a clean tester in the thickest part. A few moist crumbs are different from streaks of wet batter. If you hit a piece of apple, test another spot nearby.
If the top is darkening rapidly while the center remains wet, use a loose foil shield and continue baking. Keep the shield away from heating elements and follow normal oven safety. Avoid opening the oven repeatedly during the early part of baking. Near the end, brief checks let you see whether the center changed without letting the crust go much farther than you wanted. A shallow cake or a darker pan may finish earlier.
Set the pan on a rack once the cake is done. Let it sit for about ten to fifteen minutes if it releases well that way. Lift it with the paper or loosen the edges before turning it out carefully. Cool it on a rack where air can reach the bottom. Cutting too soon can make the crumb seem wetter than it is. Let the loaf reach room temperature before deciding whether the centers of the apple pieces were as soft as you intended.
If you want to compare a glass dish with a metal tin, use the dish only if it is suitable for the temperature and follow its instructions. Check earlier when changing bakeware rather than assuming the same time. Let the cake cool enough before lifting it so the fruit-filled middle does not split away from the darker edges.
Taste a middle slice and an end slice
Use a serrated knife to cut the cooled loaf. Look at the distribution of fruit. If most pieces are in a dense band near the bottom, the dice may have been too large or the batter too loose. If the entire crumb is firm and there is a dry edge around every slice, start checking earlier in the next bake or use a pan that does not darken the sides as quickly. If the fruit tastes good but disappears in the cake, make the pieces a little larger next time rather than adding much more.
Try the end slice with no garnish first. Its crust will taste more strongly of the cinnamon and browned sugar. A middle slice lets the apple and yogurt show through. A small spoonful of plain yogurt can be a useful contrast if the cake is quite sweet. If you would like to serve it with something richer, taste a bite with the topping before putting it on every slice. The cake can also stand on its own beside a cup of tea.
If the first cake was pleasant but you want a warmer spice, try one change. A small pinch of nutmeg can deepen the cinnamon. More lemon zest gives a brighter result. Keep the fruit, flour, and pan the same for that comparison. Changing several spices at once makes it harder to remember what you liked, and a strong spice can cover the difference between two apples.
Keep a few notes about the loaf instead of the whole afternoon
Record the apple variety if you know it, the cut size, the pan, and the moment the middle passed the tester check. Note whether the edges were as dark as you wanted. A loaf that was perfectly baked but too tall for your usual slices might need a wider pan. A loaf that held good pieces of apple but tasted too mild may need a different fruit rather than more time in the oven.
For another meal, keep slices covered and follow appropriate storage guidance for the ingredients and the local conditions. If freezing, cool the loaf completely and use a suitable freezer container. Slice it before freezing if you want to take out only one piece. Keep a little room around a slice when you serve it again so the crust and center can be tasted separately. The goal is a cake whose apple is still noticeable after the first day.