Choose the bread for the way you want to eat it
A flatbread meant to scoop up a thick stew can be a little sturdier than one you will wrap around a row of vegetables. Begin with the size of the skillet and the size of the finished meal. A six-inch round is easy to turn on most home pans and can hold a modest filling. A larger piece may reach the sides before it lies flat. If the edges touch a raised rim, they will cook differently from the center and may become stiff where you want to fold them.
For six small wheat flatbreads, start with 240 grams of plain all-purpose flour, about 145 grams of warm water, half a teaspoon of fine salt, and a tablespoon of neutral oil or mild olive oil. Use the water amount as a starting point, since flour can absorb it differently. You will also need a clean surface, a rolling pin or suitable smooth bottle, and a skillet approved for the kind of dry heating you plan to use. Follow the pan manufacturer's instructions. Have a clean towel for wrapping the cooked breads.
Decide whether to make the whole batch at once. One piece can go into the skillet while you roll the next if the pan heats gently and you can watch both. For the first batch, shape two pieces before heating the pan so you can pay full attention to the first one. The dough can rest covered while you get the skillet ready. The room you need is only a little wider than one bread, but clear a second place to put the finished stack.
Mix a soft dough and let the flour take up water
Stir the salt into the flour. Add the oil and most of the water and gather the dough with a spoon or clean hand. If a large patch of flour remains dry after mixing, add the reserved water a small spoonful at a time. Once the dough holds in one piece, turn it a few times in the bowl until it feels fairly even. A soft dough is easier to roll thinly. If it sticks heavily to everything, give it a brief rest before deciding to add more flour.
Cover the dough and leave it for around twenty to thirty minutes. This rest gives the flour time to hydrate and the dough time to relax. When you return, press it with your palm and see whether it spreads easily. A dough that pulls right back as you stretch it may benefit from a few more minutes. There is no need to knead vigorously for a long time to make a bread that will be cooked in thin rounds.
Divide the dough into six similar pieces. Use a scale if you want the breads to be close in size. Round each piece lightly and keep it covered until it is time to roll. If a cut edge begins to dry, tuck it underneath so the outside feels smooth. A damp surface can stick to the board, so keep the cover from touching the pieces if it has visible condensation. The objective is a dough that feels soft when you pick it up and still releases cleanly.
Roll the first piece thin enough to bend
Dust the surface lightly with flour and flatten one ball with your palm. Roll from the middle outward, then turn it and roll in another direction. Stop every few passes to see whether the middle is thicker than the edge. If you press mostly near the outer part, you can produce a thin perimeter and a doughy center. Aim for a thin sheet with an even feel under your fingers. It can be slightly oval or uneven as long as it lies flat.
Brush off loose flour before cooking. A heavy dusting can burn in the pan and leave a dusty edge. If the dough sticks to the board, lift it carefully with a scraper and use a little more flour underneath next time. Avoid folding it over itself when you lift it. A doubled corner cooks more slowly and can stay raw where the rest has already developed spots.
Try rolling the second ball slightly thinner or thicker than the first. Set them on separate lightly floured surfaces or cook the first before stacking any raw rounds. This will give you a useful comparison. A very thin bread blisters quickly and can become crisp if it stays too long. A thicker piece takes more time and may make a good scoop. Save the thickness that suits the filling you chose.
A rolling pin with a wide barrel can push dough more evenly than a narrow bottle, but the pressure you use matters more than the tool. If the outer edge becomes paper thin while the middle remains thick, return to the middle and ease the dough outward in several short passes. Use the flat of your hand to check the rolled round before moving it.
Let bubbles tell you when to turn
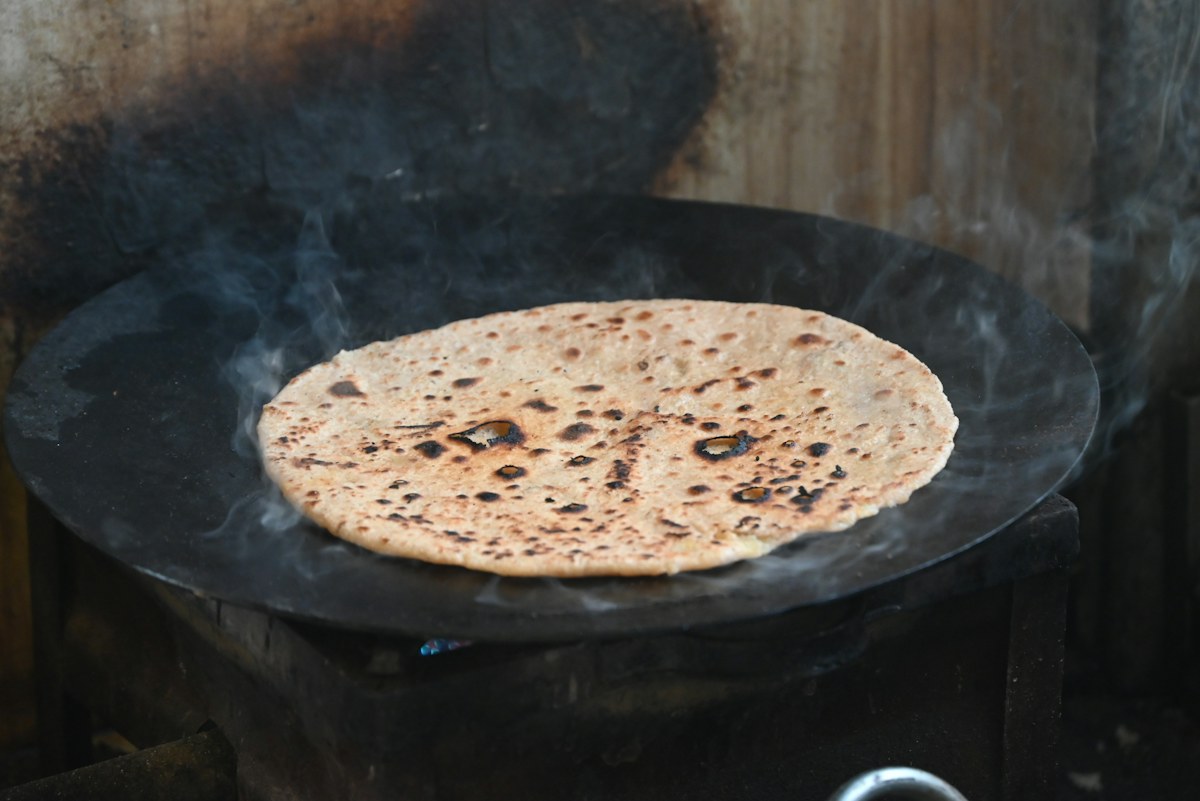
Heat the suitable skillet over medium to medium-high heat as appropriate for the pan. Put the first piece down flat and leave it long enough for the surface to start changing. Small bubbles should appear after the dough has had a chance to heat. Lift the edge with tongs or a spatula and look underneath. Light brown spots are a cue to turn it. If the underside is turning black before the top shows a bubble, lower the heat or move the pan briefly away from the burner.
Turn the bread close to the skillet and let the other side cook. Watch the raised areas. A pocket of steam may lift part of the dough. Leave it unless you need to bring another patch against the heat. Pressing every bubble flat can make the bread denser and is unnecessary. Move the bread if one section remains pale while the rest has color. Take it off when both sides have spots and the dough is cooked through, with no wet-looking band at the edge.
Check the pan before putting in the next piece. Loose flour may have darkened. Remove it safely once the pan can be handled and adjust the heat if each bread is cooking faster than the last. If the breads are pale and becoming firm before they blister, give the pan a little more heat. A well-heated pan can finish a thin bread before it has time to dry all the way through. Stay close, since the difference between a brown spot and a burnt edge can be brief.
Wrap the breads while they are warm
Set the first cooked bread inside the clean towel. Add each new bread to the stack and fold the towel over again. The warmth and a little trapped moisture help the surfaces stay soft. If you want a crisp bread, leave it on a rack instead, where both sides can release steam. Try one of each if you are unsure. A bread served beside a dip may be good with a firmer edge, while one meant to wrap needs to bend without breaking.
Brush lightly with a little oil or melted butter if the meal suits it. A pinch of salt or chopped fresh herbs can go on while the bread is warm. Keep some plain when you are using several fillings. A strongly seasoned bread can cover a mild vegetable or cheese. Taste a small piece by itself first. If it already has enough flavor, leave the stack as it is and let people add the finish they prefer.
Fold one round around a small spoonful of filling. If it cracks, see whether the edge dried in the pan or whether the entire bread is too thick to bend. Warm it briefly in a suitable skillet or use it as a scoop. Roll the next batch a little more evenly and remove the breads as soon as they are cooked. If a bread feels gummy, roll that piece thinner or give it more time on moderate heat before taking it off.
Keep the method flexible for the next table
A stack of small flatbreads can work when people have different fillings. Set out cooked vegetables, a thick sauce, or a few prepared beans and let each person fold a small portion. Give wet fillings their own spoon so the breads do not have to wait under liquid. A shallow layer is easier to eat than a large pile. Fold the bottom inward if the filling needs support, or serve the bread open with a fork when the pieces are too large to wrap.
Note the pan and the thickness that gave you the best spots without a dry rim. Record whether you wrapped the breads as they finished. The water amount is useful if you use the same flour again, and the way the dough felt is more useful if you switch. A soft ball that rolls into an even sheet and a pan that gives you a few clear spots are the two cues to carry to the next batch.
If the fillings will be served as a shared plate, start with small portions and replenish them when needed. Keep cooked or perishable ingredients at suitable temperatures while they wait. The breads can stay wrapped separately, where they will not pick up moisture from the other dishes.